
Whether on a fireplace, ceiling, wall or bar, shiplap is a great DIY project that provides big impact with little effort. In less than a day, you can transform a room or space by adding a warm, textured tongue-and-groove shiplap wall. Best of all, our wood shiplap makes installation even easier because of its rustic finish. The distressed face and jointed boards are very forgiving in the installation process, hiding seams, nail holes and imperfections.
Here are 8 tips and tricks on how to create your DIY shiplap accent wall:
1. Calculate how much shiplap you need. Measure the length and width of the space you would like to cover. Then use our handy calculator to figure out how much shiplap you need. We include an extra 10% so you'll have enough for any cuts or errors.
2. Stain or paint the shiplap paneling if needed. If you are staining or painting our raw Red Oak or Poplar shiplap boards, apply the finish before installation. Allow the finish to dry fully - preferably in the space where it will be installed. This allows the wood to acclimate to the temperature and humidity.

3. Select a design or pattern. The most common installations are horizontal, however shiplap can also be installed vertically, at an angle or using a herringbone tongue-and-groove pattern. In these instructions, we will assume a horizontal or vertical installation, however the pattern is up to your imagination!
4. Decide whether to install the shiplap with or without a nickel gap. Typical nickel-gap installation allows for a 1/8" gap between boards that is covered by the lip of each board. Our shiplap paneling can be installed with the gap or with the boards pushed together. Because our shiplap is distressed, perfect gap alignment using spacers isn't necessary as long as the boards are straight.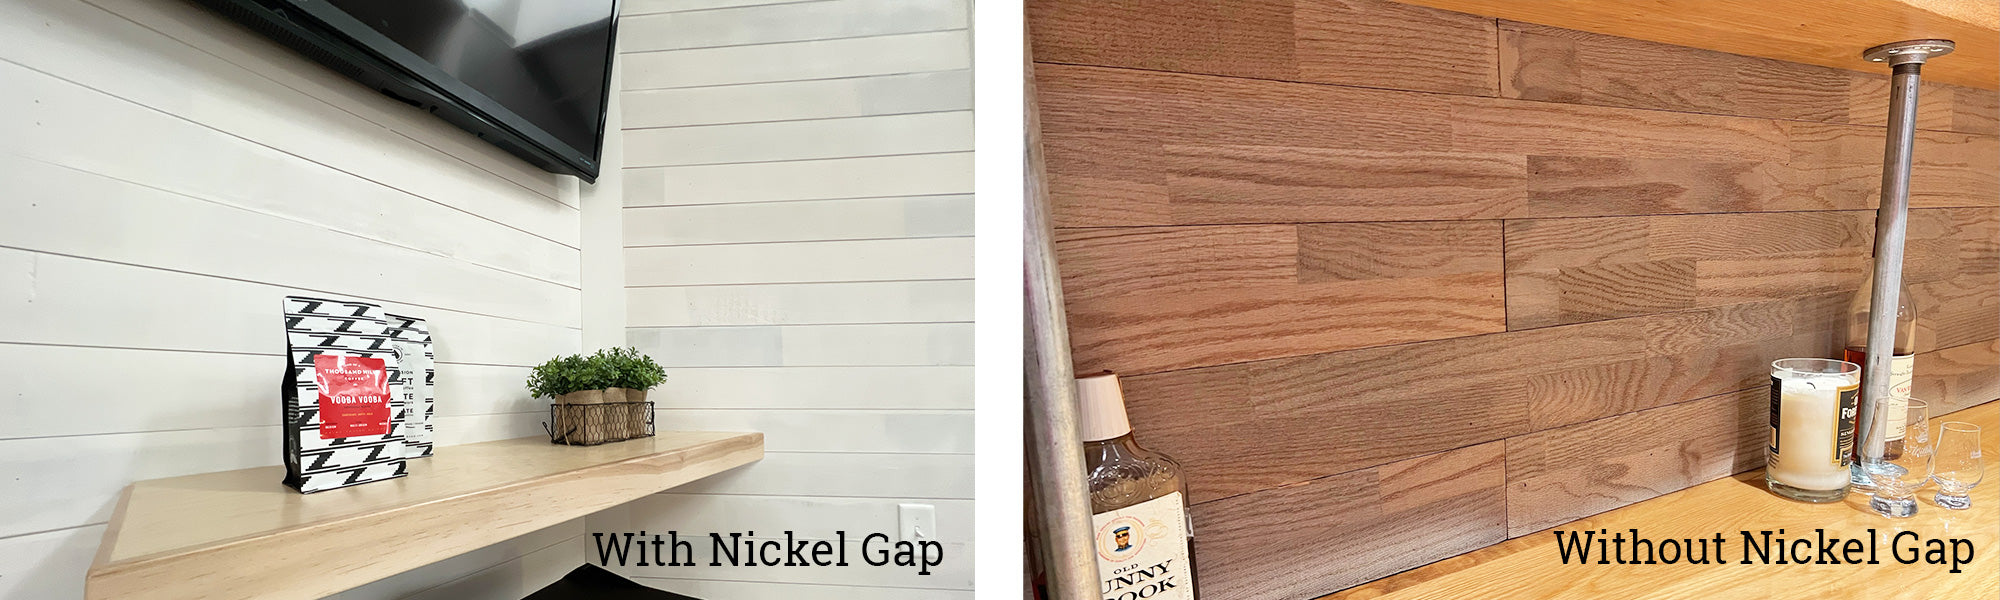
5. Is it better to nail or glue shiplap? There isn't a wrong way to install shiplap. Whether to nail or glue depends on the DIY'ers preference and the material being installed. Our wood shiplap is lighter weight than composite materials like MDF which means it can be glued instead of nailed. However if you would like to avoid the drywall damage from adhesive, pin or brad nails can be used to attached the shiplap. Nailing can be done with or without power tools. If nailing, locate and nail into the studs of your wall whenever possible.
6. Start shiplap installation at the bottom of the accent wall. If your shiplap is going to the bottom of the wall, start your installation on top of the baseboard or at the bottom of the wall if you prefer not to have baseboard. In our case, we were installing shiplap in a bar so we started at the countertop. This ensures that any partial piece is at the top of the wall where it will be less noticeable.

7. Get the first shiplap board level. Having the first piece straight is important since the rest of the shiplap paneling will be installed on top of that anchor piece. This can be tricky since floors and walls are typically not perfectly straight or level. Since our wood shiplap is distressed, it is more forgiving. Sometimes "straightness" is in the eye of the beholder; installations that look straight with the wall or floor may be better than having a piece perfectly straight with a level.
8. If desired, stagger cuts and butt joints. Wood shiplap can be butt jointed where necessary. Because our shiplap is fingerjointed, these joints are less noticeable. However you can stagger the butt joints on the wall to avoid having a potential line in your installation.
Once the first shiplap piece is in place, simply attach each piece to the wall until your wall is covered. As an added bonus, the distressed finish of our wood shiplap hides the nail holes so you can skip the putty and filler - allowing you to enjoy your new DIY shiplap accent wall sooner. Maybe with a nice pour on the rocks. Cheers!
